
Click on MATERIAL SELECTION/DETAILS in
Material Shipment Management.
Click on ADD in the right horizontal toolbar.
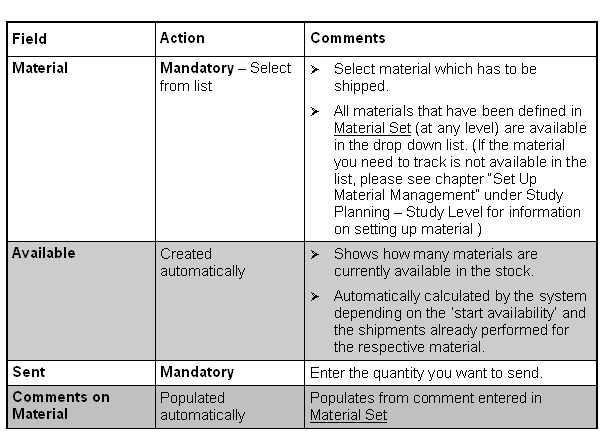
Material, Sent
If several materials are sent with one shipment, create (ADD) a
separate line for each material.
After having entered all materials which are sent and SAVE,
CLOSE the window.
To mark the shipment as 'Sent', now click on

SEND in the right lower horizontal toolbar of Material Shipment
Management window. Note: once you have 'Sent' a shipment you
cannot make any modifications to it, not even delete it.